Flashing firmware
Much of this section is taken from the source thread on RC groups and mirrored here for readibility.
Flashing is the process of saving the opensource firmware to the board, so that it can be used. It’s not very hard, and the board usually does not break unless power is connected incorrectly or the step in bold is performed differently.
Preparing the hardware:
The quad is flashed using a ST-Link v2, included with your kit. The quad’s flight controller is fitted with a socket:
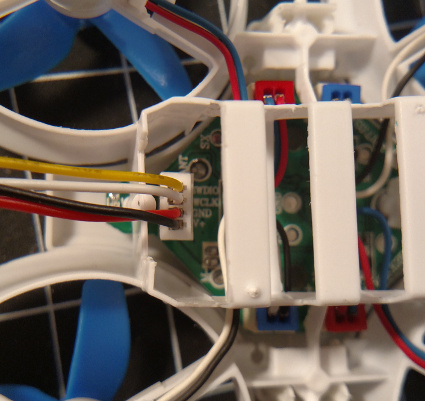
The Header Jumper and Jumper Wires should be connected to the ST-Link. The Header Jumper wires should (through the Jumper Wires) be connected as such:
| Color | Pin |
|---|---|
| Red | GND |
| Black | 5V or disconnected |
| Yellow | SWDIO |
| White | SWCLK |
Note: the black and red wires aren’t attached to their conventional connections.
If you’re using the included Header Jumper, it should plug neatly into the Jumper Wires. When attached, it should look like this:
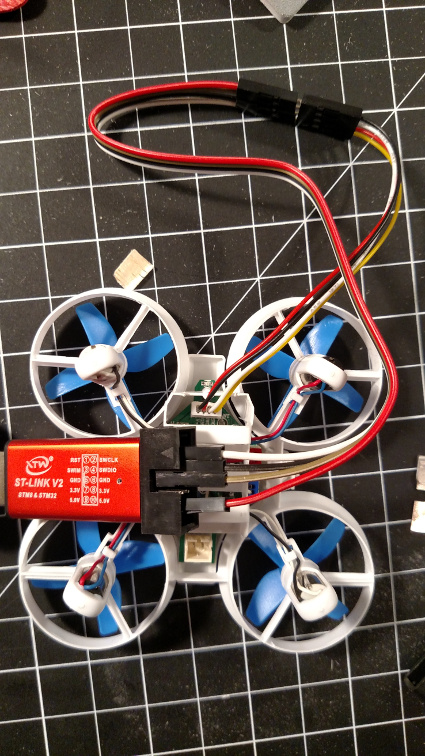
Do Not connect both the +5V pin if the battery is also connected. This will damage the board
If connector is not available, wires can be soldered to the board instead. Note that the CLK and DAT labels on the Flight Controller are reversed.
3 wires are needed, Ground ( GND) , CLK ( SWCLK on stlink) and DAT( SWDIO on stlink). Connect the pads / plug to the equivalent place on the ST-Link: GnD <-> Gnd , DAT <-> SWCLK and CLK <-> SWDIO.
At this stage, we’ll assume you have a compiled firmware you wish to flash. This may be from the Firmware Compilation step above, or it may be a precompiled firmware. Either way, make sure you have something to upload after erasing the factory firmware.
Erasing the factory firmware:
If this is the first time you’re flashing new firmware, the factory firmware has to be erased. This step only needs to be performed once, it does not need to be done every time the board is flashed.
The pristine factory firmware cannot be restored after this step. However, there is a factory-like firmware included in the /bin/ folder of this repository.
-
Connect the board to the ST-Link. Do not connect the 5V pin from the ST-Link - we’ll be getting power from a battery for this step. You need to complete the next step within a few seconds because current firmware repurposes the programming port to control a camera. If you can’t connect, cycle power and try again.
-
Using the St-utility, connect to the board. You should get a message saying the board is protected ( “Cannot read memory”).
-
In the Target menu, select “Option bytes”.
-
Select “Level 0” ( Should have been Level 1 originally )
Do not select an incorrect Level and apply it as it will kill the board. -
Double check you have “level 0” selected
-
Click Apply ( this will erase the factory firmware - click cancel instead to abort)
-
-
At this the factory firmware should erased. Click disconnect, and remove power from the board. You can now proceed to the next part.
Flashing a new firmware:
-
Connect the ST-Link to the board, and connect power. This may use either the 5V pin or the battery, but not both.
-
Open the ST-Link Utility program , and press the “connect” button. The program should show connection progress in the bottom part.
-
In the target menu, select “Program and verify” or “program”. A popup will ask for the file to program. Select the firmware downloaded or compiled
.hexfirmware file here. After the file selection, click start, and wait a few seconds for the process to complete.
The new firmware is flashed at this point, and the drone is ready to be used.